I am a big fan of Apple products, but when working with a USRP, a Linux PC is always my first choice. Recently, my wife won an M1 Macbook Air in her company’s lottery (how lucky she is!), so I decided to test its compatibility with my USRP B200mini. In this blog, I going to share the process of installing the driver and benchmark it.
Binary installation
I am not a hard-core developer, so I never build source code myself if the binary file is available. From the USRP manual page, it is recommended to use MacPorts for the installation, but I prefer Homebrew. So the first step is to install Homebrew if you don’t have it.
The Homebrew and MacPorts are packages managers just like the
apttool in Debian/Ubuntu.
The second step is to isntall the UHD (the driver and tools for USRP):
1
brew install uhd
Alternatively, the installation of GNURadio will have the UHD installed too. Since I will need the GNURadio anyway, it is best to only install the GNURadio, otherwise, I will have two copies of UHD installed.
Prefix
The concept of prefix confused me for a while when I first met it. From my understanding, it is the location where the packages (and the Homebrew itself) will be installed, and in our case, they are GNURadio and UHD. The prefix is /usr/local for macOS Intel, and /opt/homebrew for Apple Silicon (and my M1 Macbook Air).
Normally, the executable files are installed in places like /usr/bin, /bin, /usr/sbin, where you need sudo privilege to add or remove stuff. It is dangerous and you are likely to break your system. However, with the prefix, you will have peace in mind: you don’t need sudo when you brew install, and it won’t crash your system when you accidentally delete a file. It is something like the virtual environment in Python.
I can still remember the day I deleted my Ubuntu desktop when I was trying to upgrade the Python.
Anyway, all you need is:
1
brew install gnuradio
And the GNURadio will be installed in the prefix folder.
Download UHD images
Before using the USRP in each power cycle, a UHD image is automatically copied into the USRP to initialize the internal FPGA. You will have to manually download them after the installation of UHD. There is a Python script for it:
1
/opt/homebrew/Cellar/uhd/4.1.0.5_1/lib/uhd/utils/uhd_images_downloader.py
Note that this is the location for Mac with Apple silicon, and you may have a different UHD version.
You can run it directly, but if Python complains, you may try another Python interpreter (from Conda for example) to run it. After a while, all images are saved in the folder /opt/homebrew/Cellar/uhd/4.1.0.5_1/share/uhd/images/.
Next, connect the USRP to the Macbook. Because there is no USB Type-A port on the Macbook Air, I used a Type-A to Type-C adaptor to connect the USRP.
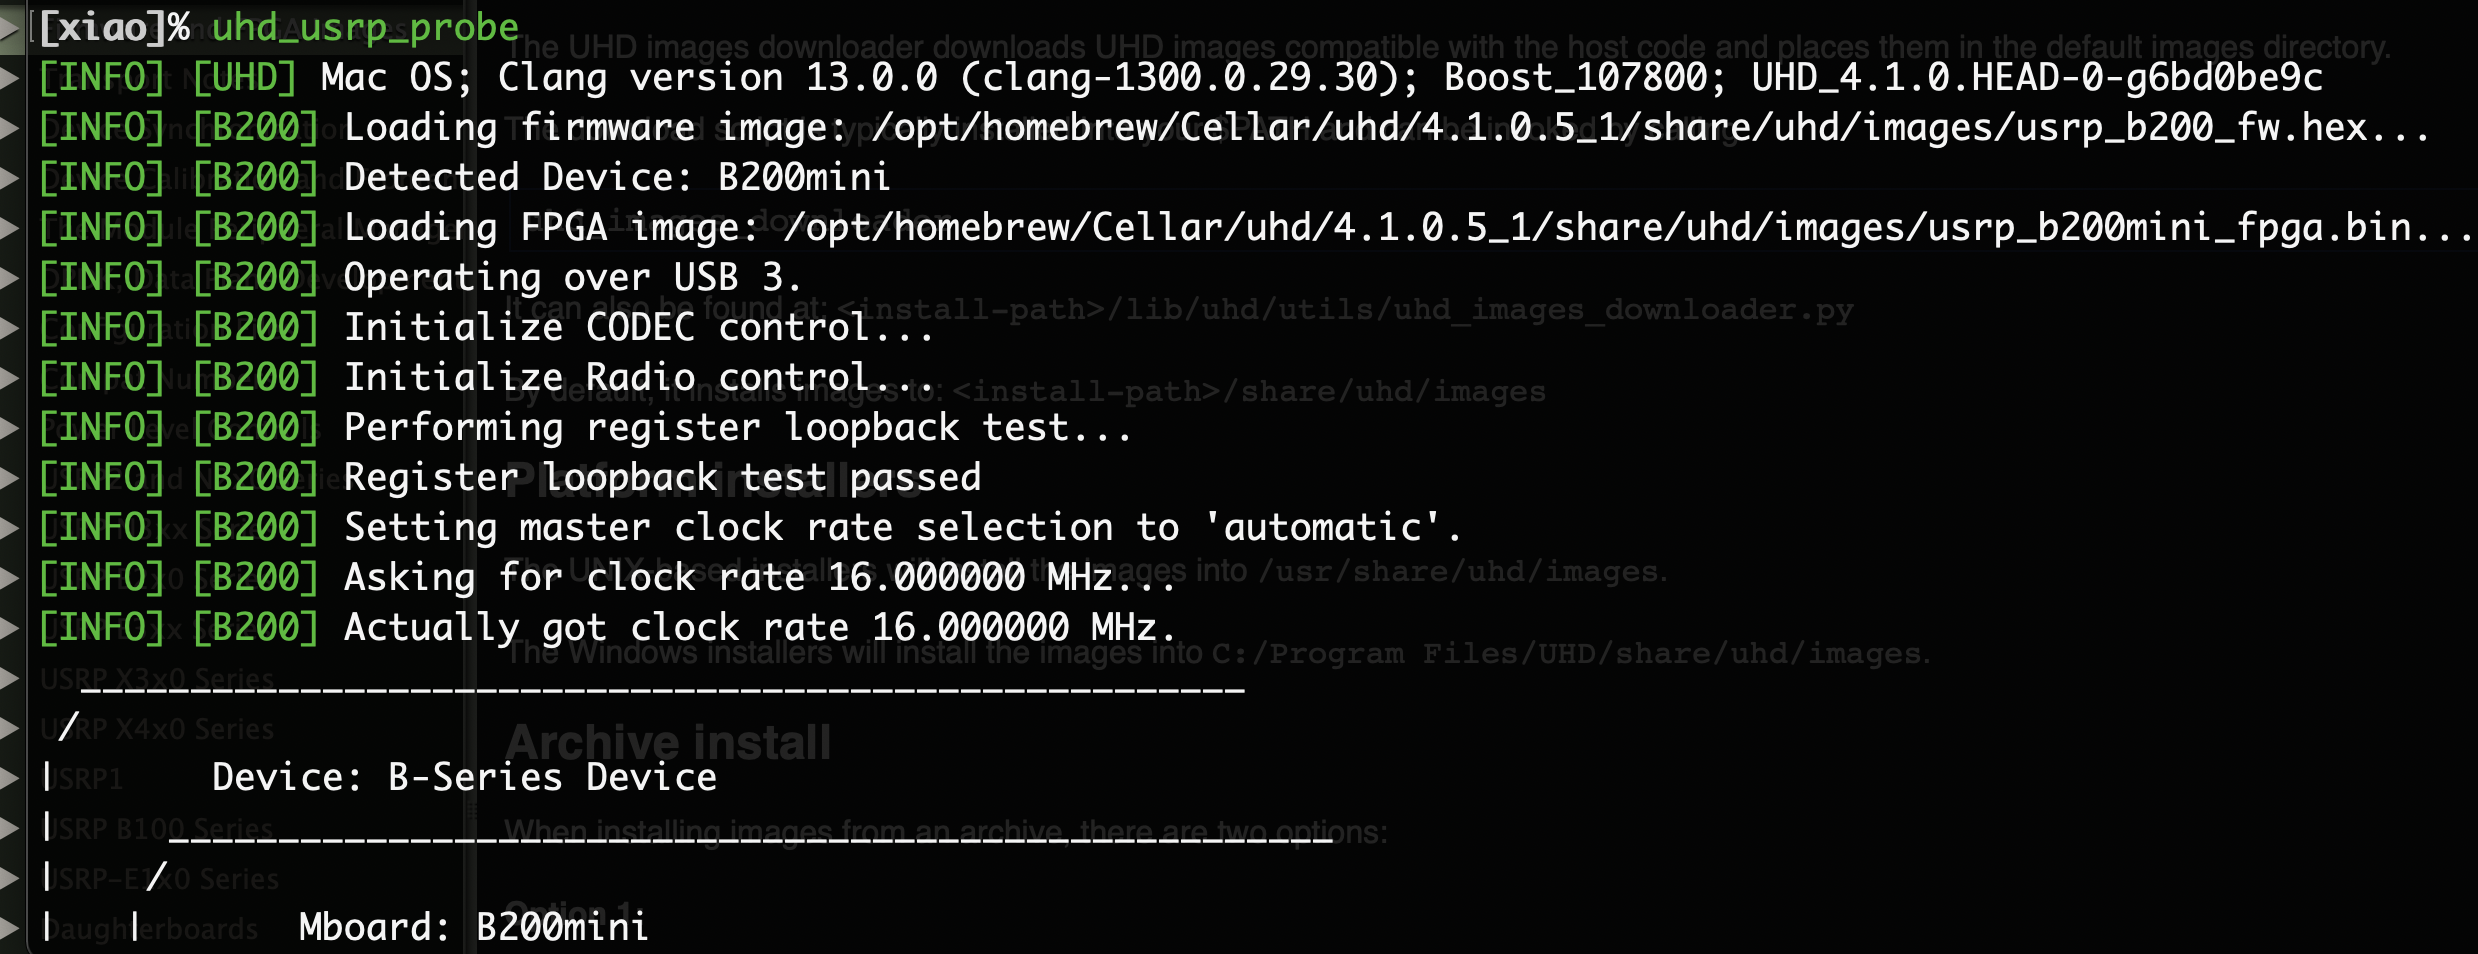
To test the connectivity, run uhd_usrp_probe command. I have the printout like this: 
If you receive a warning message below, this is either you didn’t download the images properly, or the system environment variable ‘UHD_IMAGES_DIR’ is not set correctly.
1
2
3
4
5
6
7
8
[WARNING] [B200] EnvironmentError: IOError: Could not find path for image: usrp_b200_fw.hex

Using images directory: <no images directory located>

Set the environment variable 'UHD_IMAGES_DIR' appropriately or follow the below instructions to download the images package.

Please run:
/opt/homebrew/Cellar/uhd/4.1.0.5_1/lib/uhd/utils/uhd_images_downloader.py
I got this warning when starting GQRX. This is because the software needs the environment variable ‘UHD_IMAGES_DIR’ to locate the UHD images and send them to USRP. The solution is to use the export command to set the environment variable or add the variable to your ~/.zshrc (new macOS comes with zsh instead of bash) file.
1
export UHD_IMAGES_DIR="/opt/homebrew/Cellar/uhd/4.1.0.5_1/share/uhd/images/"
Benchmarking
Finally, I can test the performance of the USRP on the Macbook:
1
/opt/homebrew/Cellar/uhd/4.1.0.5_1/lib/uhd/examples/benchmark_rate --rx_rate 56e6 --tx_rate 56e6
But the results are very disappointing with a significant amount of dropped and overflowed samples.
1
2
3
4
5
6
7
8
9
10
11
Benchmark rate summary:
  Num received samples:     538358291
  Num dropped samples:      37804075
  Num overruns detected:    330
  Num transmitted samples:  443971320
  Num sequence errors (Tx): 0
  Num sequence errors (Rx): 0
  Num underruns detected:   95882
  Num late commands:        0
  Num timeouts (Tx):        0
  Num timeouts (Rx):        0
For receiving only mode, it can only run at 40 MHz without dropping samples. These are the results of a late 2020 Macbook, so the hardware has more than enough power to keep up with the USB 3 speed. In addition, the test result from a 2013 late Retina Macbook Pro is even worse: it can only run at 22 MHz without dropping samples, like the USB 2 speed.
I had the same dropping/overflow issue when trying on a Windows PC, but no issue if switched to the Linux system.
I suspect that there is an issue with the USB driver for macOS and Windows, but I have no evidence. That is why I always use Linux for USRP related development.
That is all for today. Thanks for reading.
Comments powered by Disqus.